From the archives: RECOIL Magazine Issue 12, May/June 2014
Warning! When handling firearms, always observe safety rules and the precautions set forth in the firearm’s owner’s guide. Be certain that your firearm is unloaded and made safe before proceeding with this DIY.
When we decided to embark on this project, deciding just how to approach removing metal from the 80-percent forging was a tough decision. Everyone wants to see impeccably machined billet and flawless surfaces, but clamping the piece in a CNC machine and pressing “play” would detract from the ethos of the build. In the end, we decided that despite having access to a Haas and a couple of Bridgeports, it was only right and proper that we use the most basic equipment possible. And that means a cheap drill press, handtools and, of course, the inevitable almighty Dremel.
Bear in mind that you’re abusing the drill press more than just a little during this adventure. It’s designed to be loaded only in the Z (vertical) axis, and even though you’re only ever going to be plunging end mills into the work, you’re still going to induce side loads. This means it’s going to protest by vibrating like crazy and trying to spit the work piece into your soft parts, so wear safety glasses and take appropriate precautions.
Some Tips Before You Begin
> Ensure that the work is clamped securely to the table
> Run the slowest speed possible and use a light hand
> Clear chips away often and use plenty of cutting fluid
> Take your time to set everything up right. It’s all too easy to get drawn into making chips, but the key to a good result is in setup.
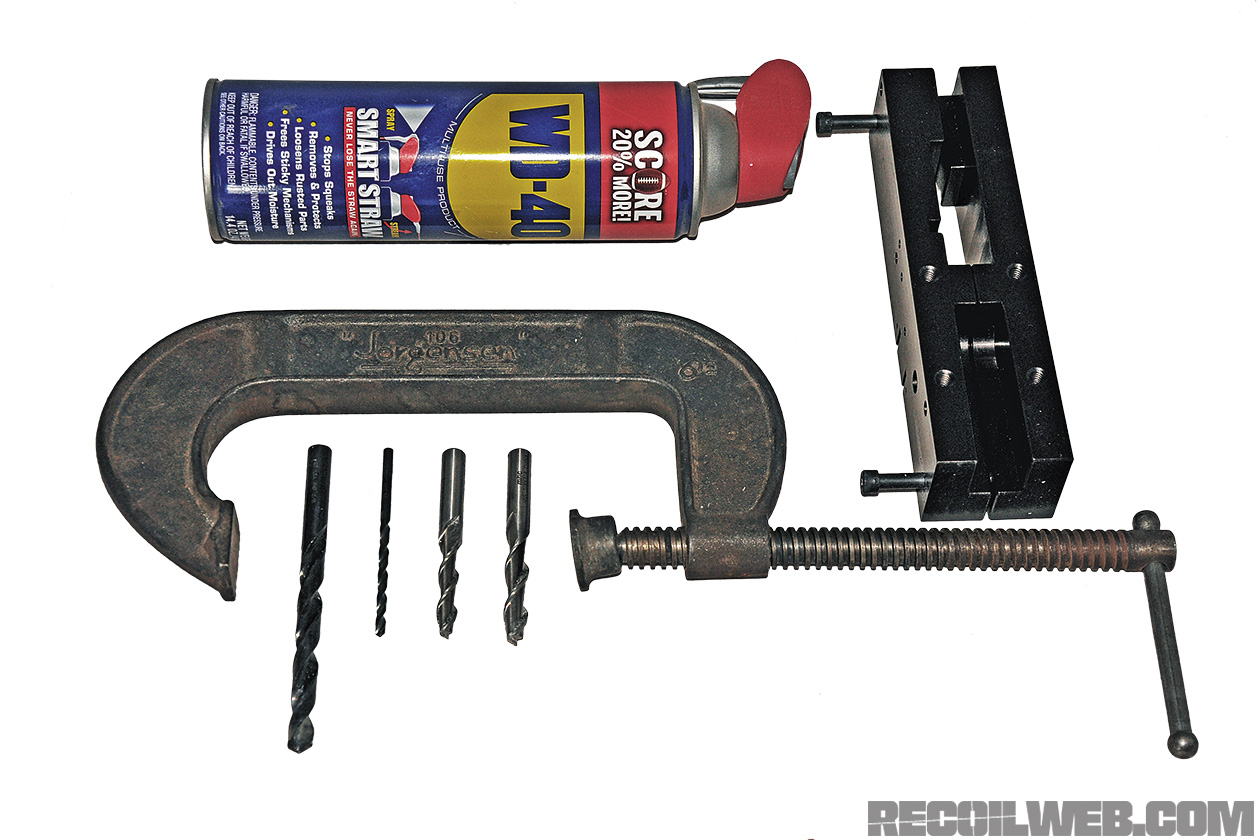
What You Need
Other than a drill press (the bigger and heavier the better), you’ll need the following:
> C-clamps (again, bigger is better, though we ran out of room on our tiny drill press table to use more than one)
> 5⁄16-inch two-flute, center-cutting end mill
> 3⁄8-inch two-flute, center-cutting end mill
> 5⁄16-inch drill bit
> 3⁄8-inch drill bit
> 5⁄32-inch drill bit
> Cutting fluid (WD-40 works well on aluminum)
Not Pictured:
> 80-percent jig
> Dremel with sanding drum and 1⁄8-inch rotary rasp
> Hand files
> Hammer, trigger, and safety selector to test fit
Step 1
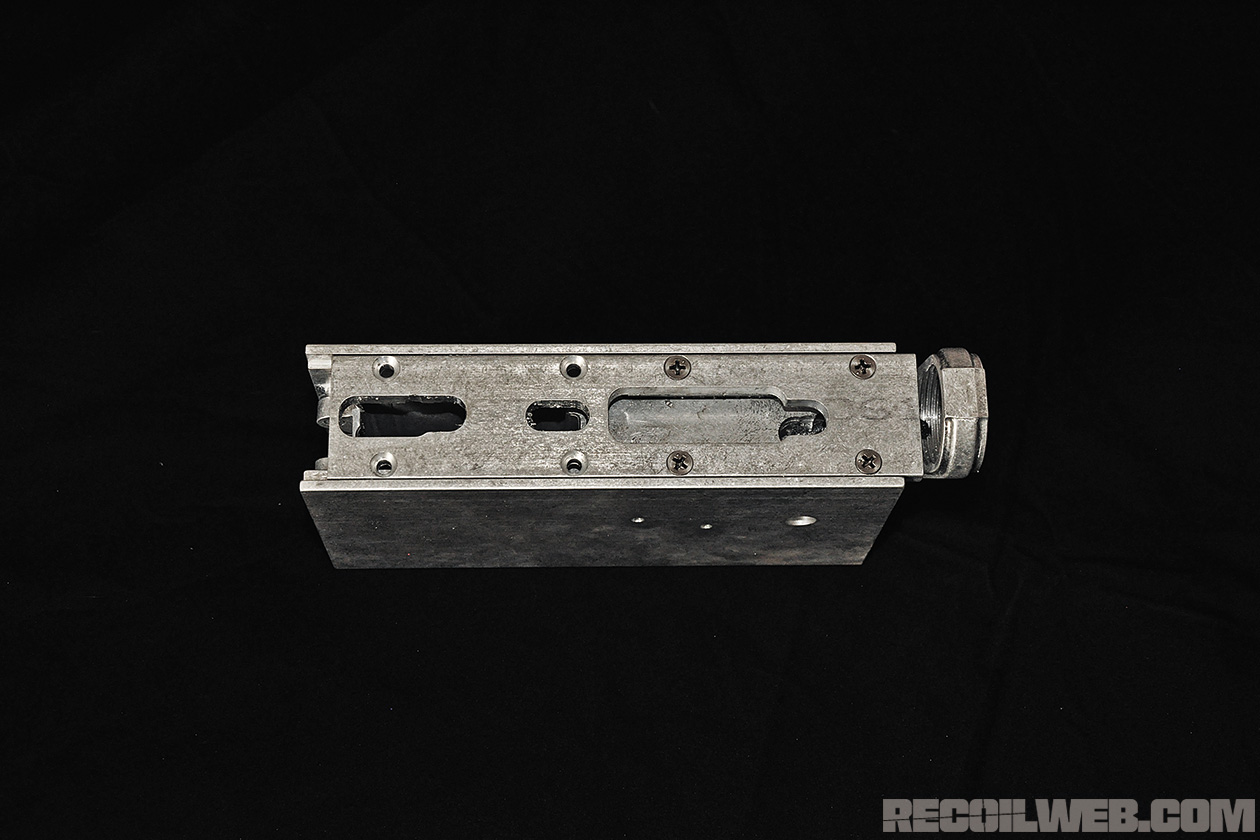
Set up your 80-percent lower in the jig and make sure it’s well secured.
Step 2
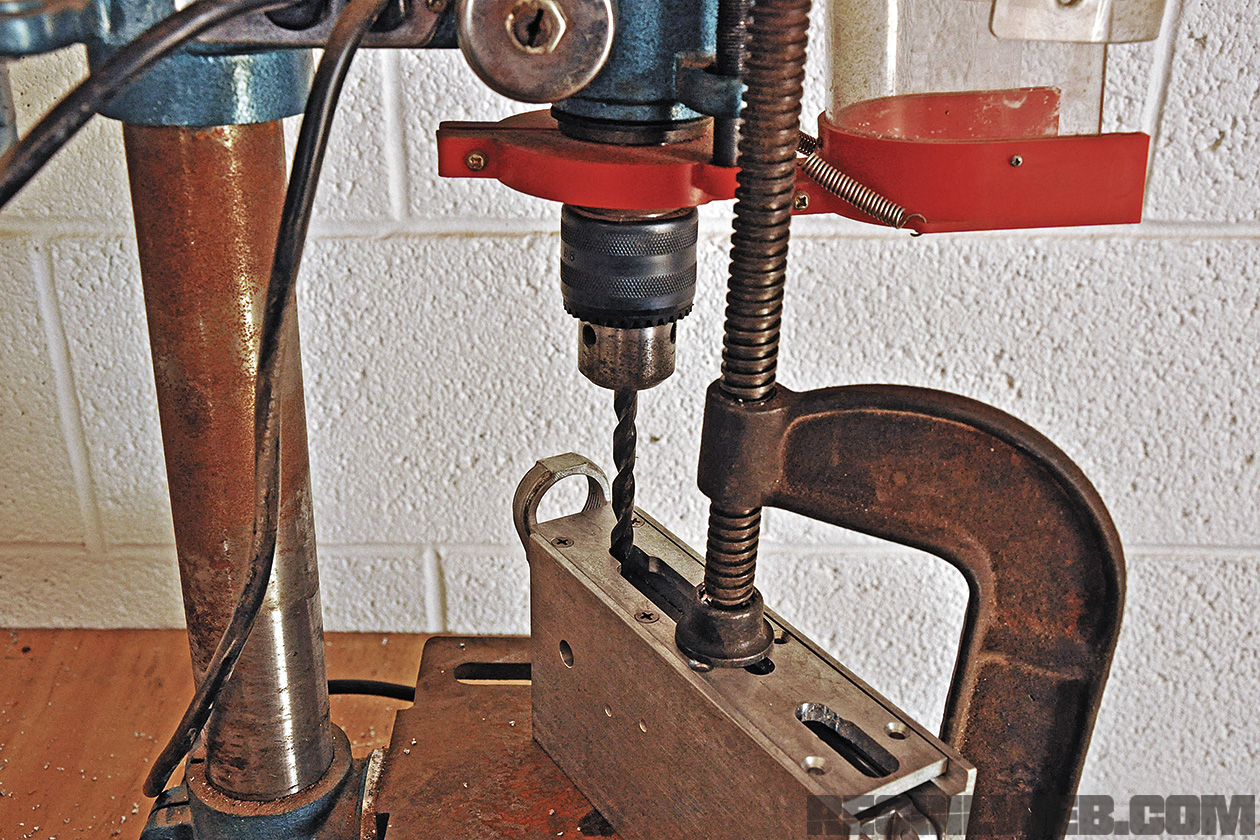
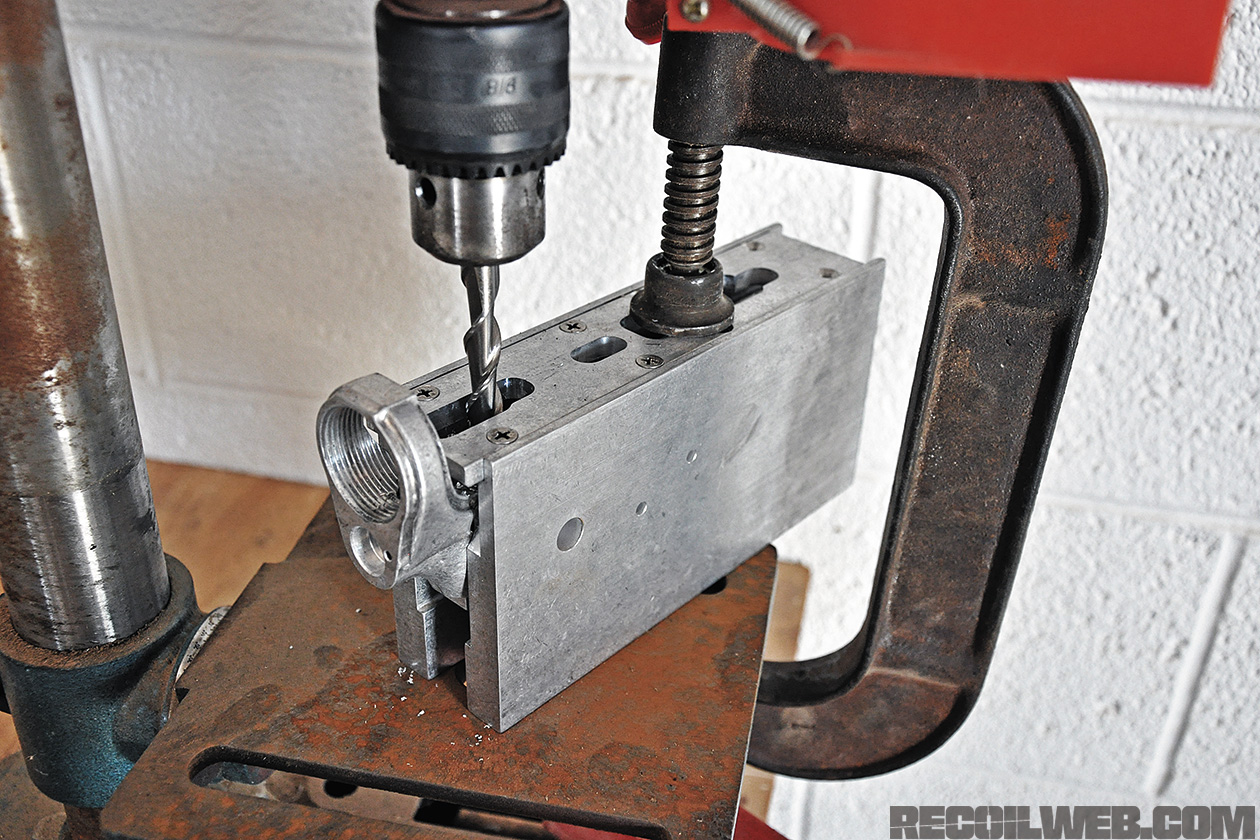
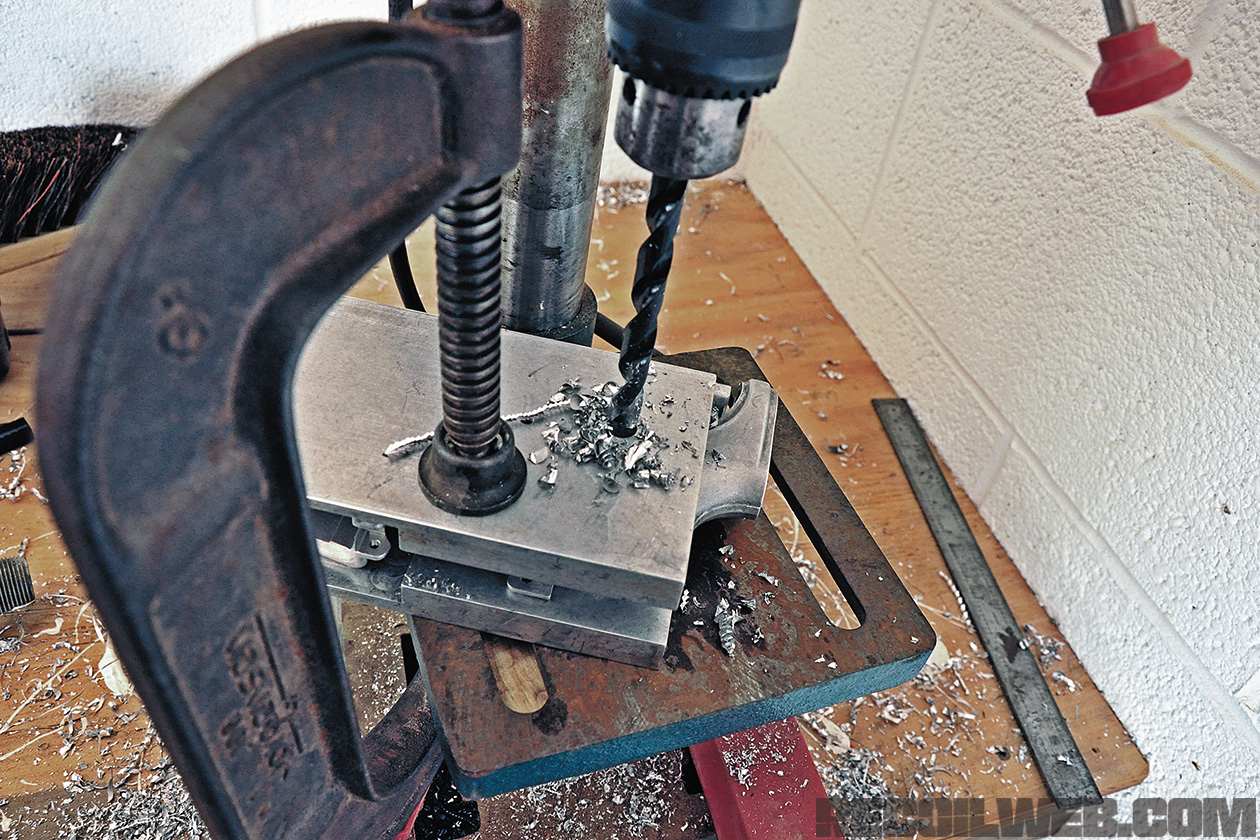
Insert a 5⁄16-inch drill bit into the chuck and tighten well. Clamp the jig and receiver to the drill press table and, with the drill not running, touch the tip of the drill to the top of the receiver. You’ll now set the depth of cut, so that the tip ends up 1 1⁄8 inches from the top of the receiver. If your drill press has a scale, use it. If not, use a steel rule to set the distance from the stop nut to the surface it contacts on the drill press casting.
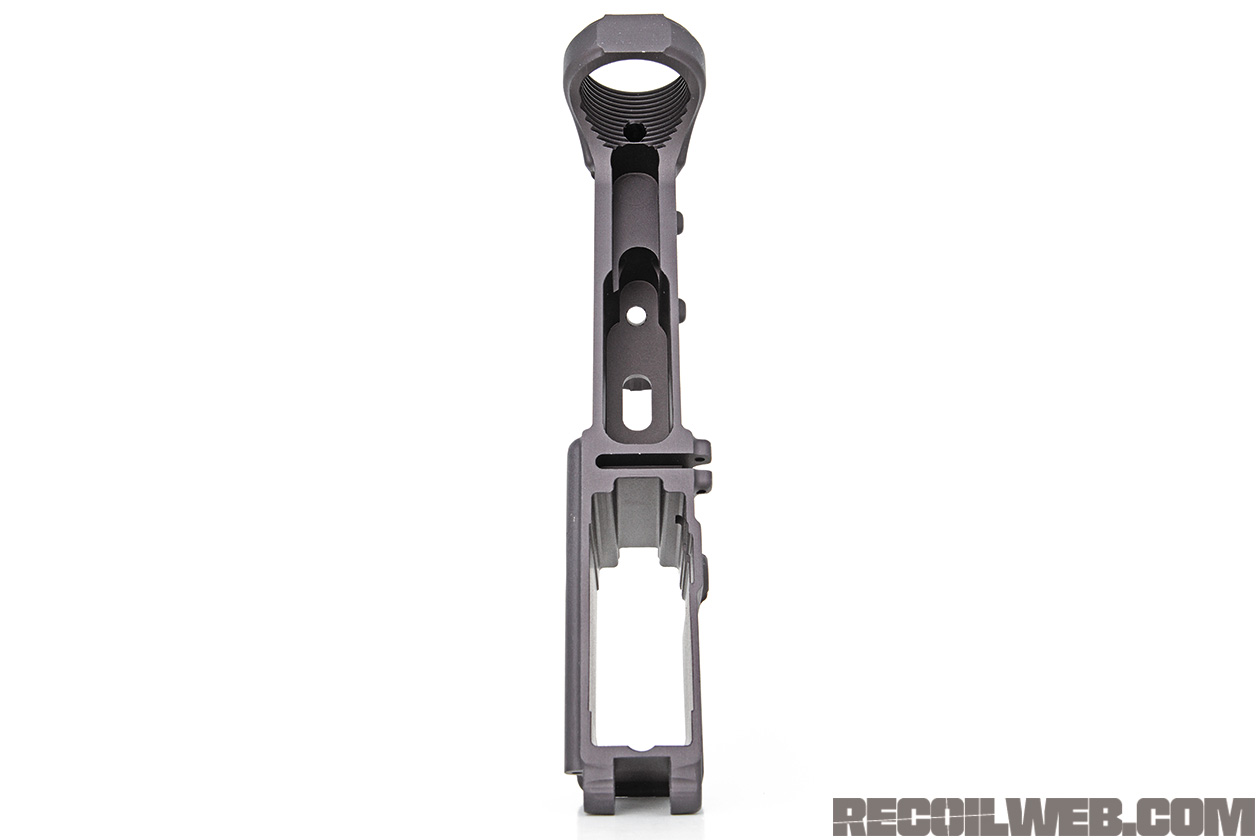
Look at a completed AR-15 receiver and you’ll see the fire control pocket has two areas. We’re going to first remove material from the deeper of the two. Line up the jig so that the side of the drill bit almost contacts the fixture. If you want to get super precise, you can hold it away from the wall 0.003 of an inch, simply by using a piece of printer paper as a feeler gauge.
Step 3
It’s now time to make the first cut. Take a deep breath and fire up the drill. Squirt a little cutting fluid and start drilling, raising it often to clear away chips. Drill all around the first area of the fire control pocket, removing as much aluminum as you can.
Now swap out the drill bit for the 3⁄8-inch end mill. Set the depth of cut 1⁄8-inch deeper, to 1¼ inches, in the same way as for the drill then go back around to finish hogging out the fire control pocket.
Step 4
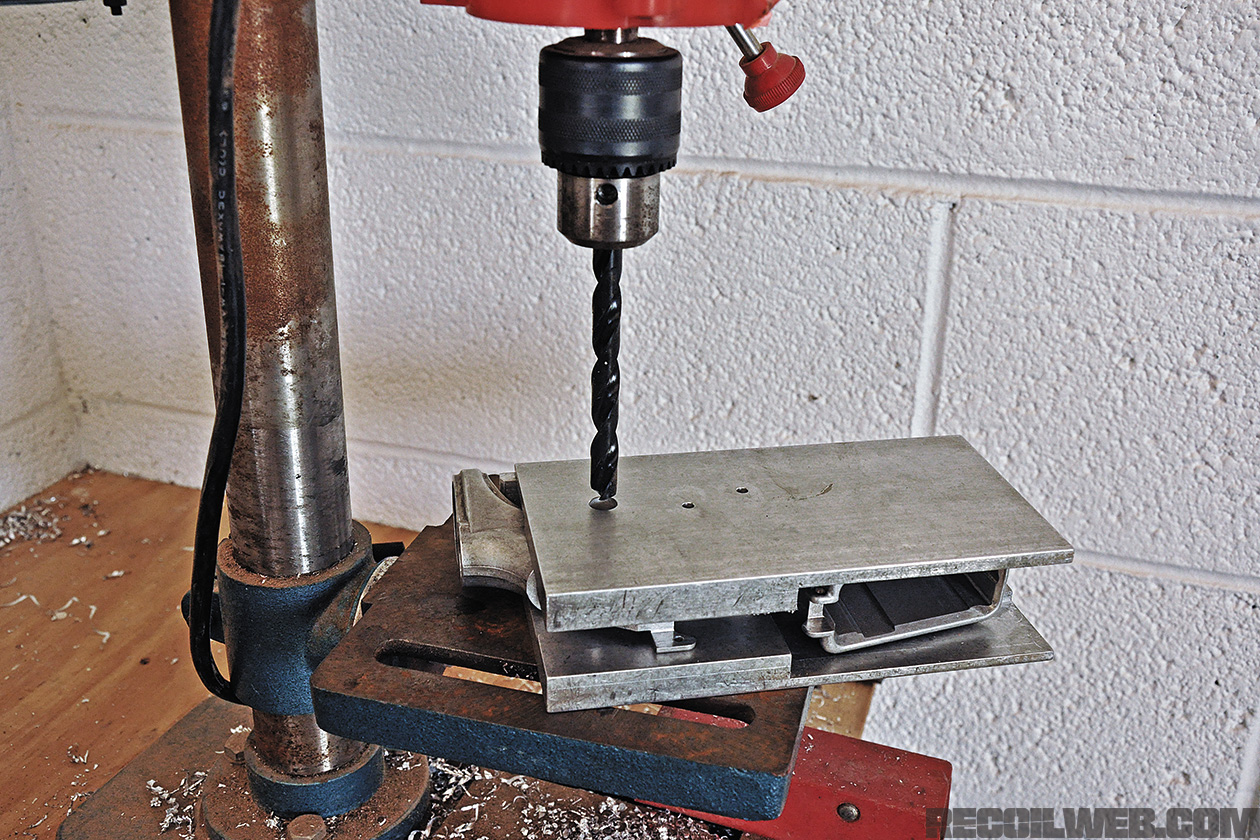
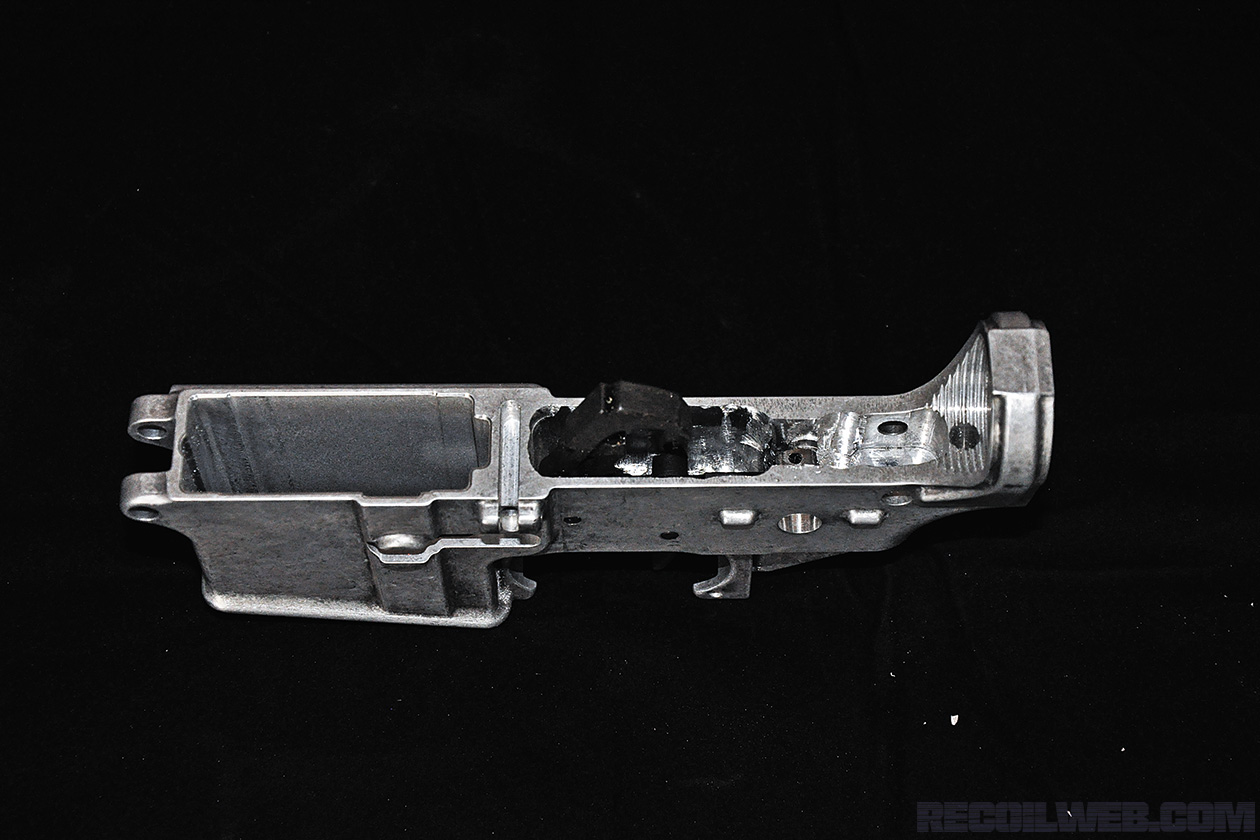
Now that you have the hang of removing material, reconfigure your jig as necessary and follow the same procedures used to set up to remove material from the shallower area of the fire control pocket. Once completed, the receiver should look like this.
Step 5
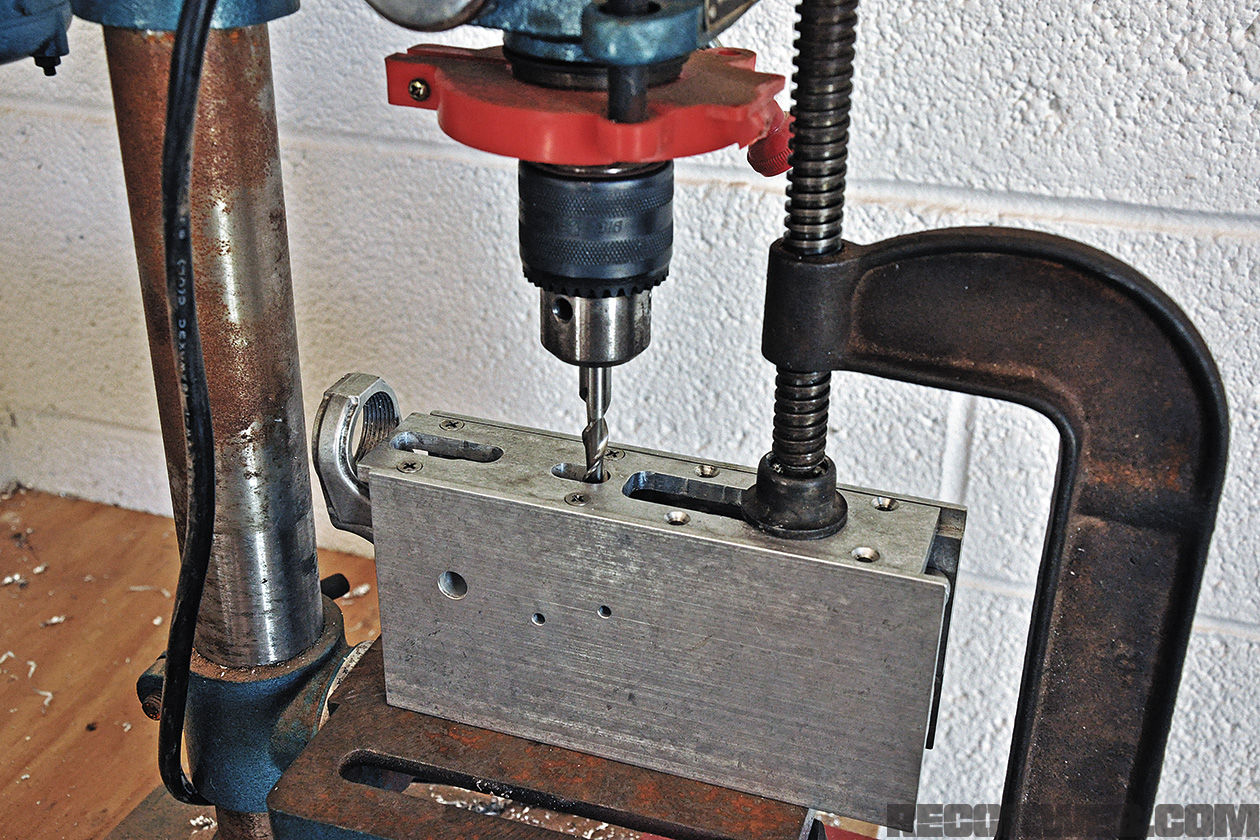
We’re now going to mill out a slot for the trigger. Set up the jig so that the trigger slot is correctly positioned and chuck up the 5⁄16-inch end mill. Using the jig as a guide, run it completely through the receiver, breaking out into the trigger guard area. Reposition as necessary and repeat until you’ve removed as much material as possible.
Step 6
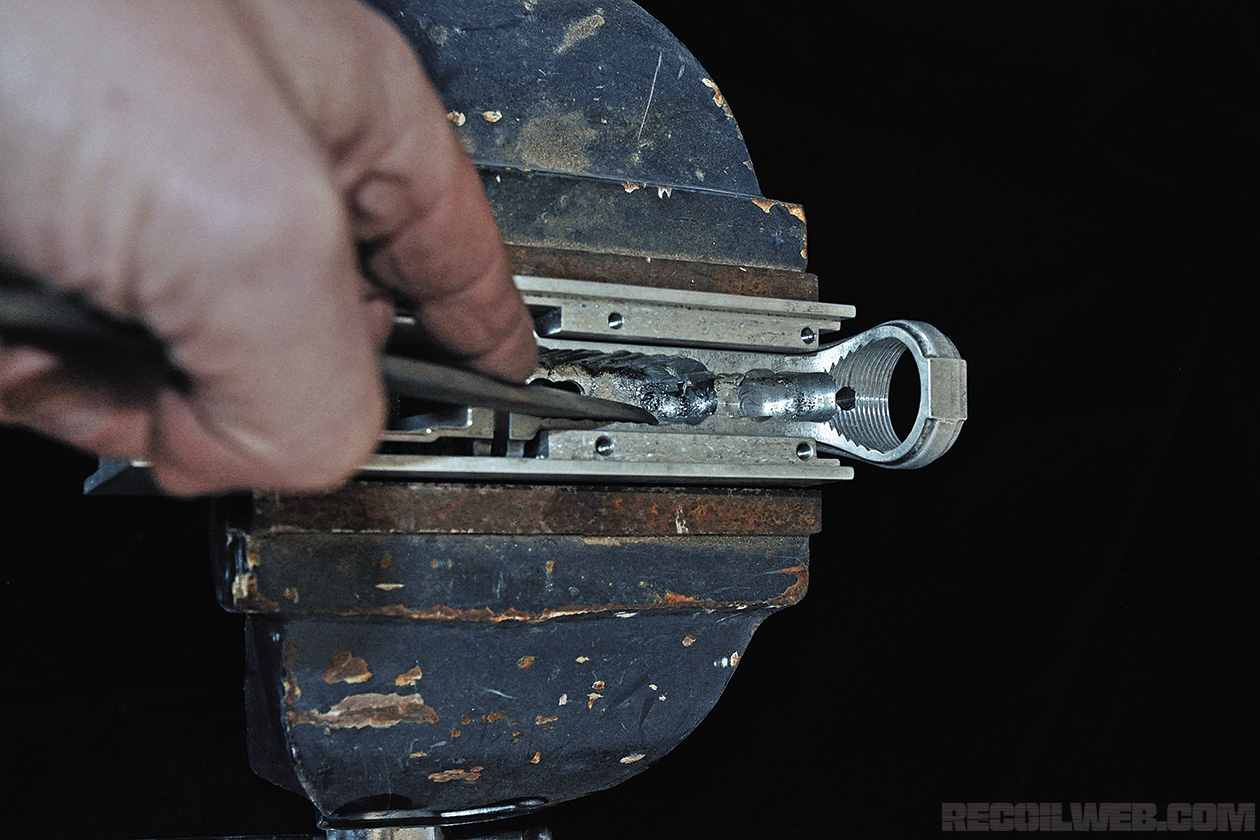
Flip the jig over onto its side and prepare to drill the hammer and trigger pin holes with the 5⁄32-inch drill bit. With the drill off, position the jig so that when you bring the drill bit down, it doesn’t make contact with the holes in the jig, instead passing cleanly through them. Now hit the switch and start drilling, stopping when you break through into the fire control pocket. Flip the jig over and repeat the process from the opposite side.
Set up the jig as above and repeat the process with the 3⁄8-inch drill bit to drill the 3⁄8-inch hole for the selector.
Step 7
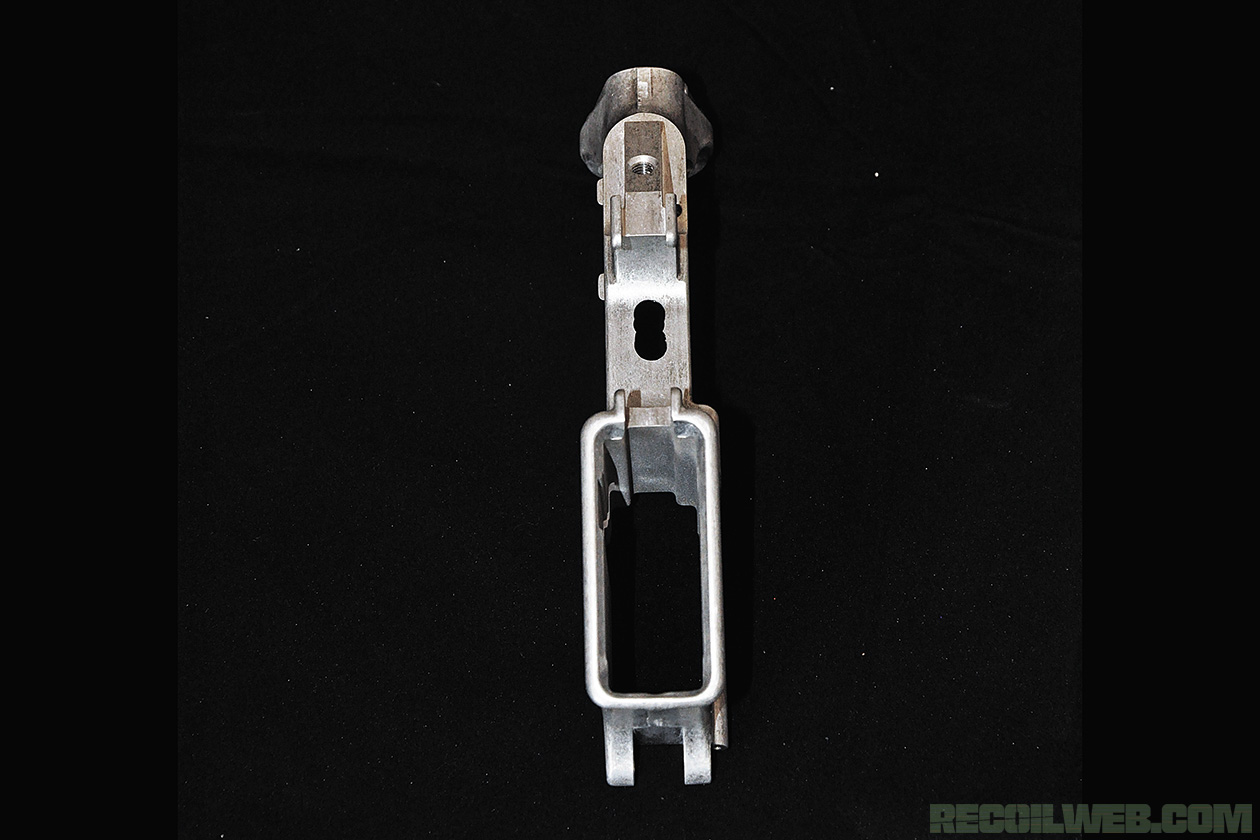
You can now break down the jig and remove the receiver in preparation for hand finishing. Using your Dremel with a sanding drum, flatten out the peaks and valleys caused by the end mills. Carefully use the rotary rasp to flatten out the very bottom of the pocket, then switch to hand files for a final finish.
Step 8
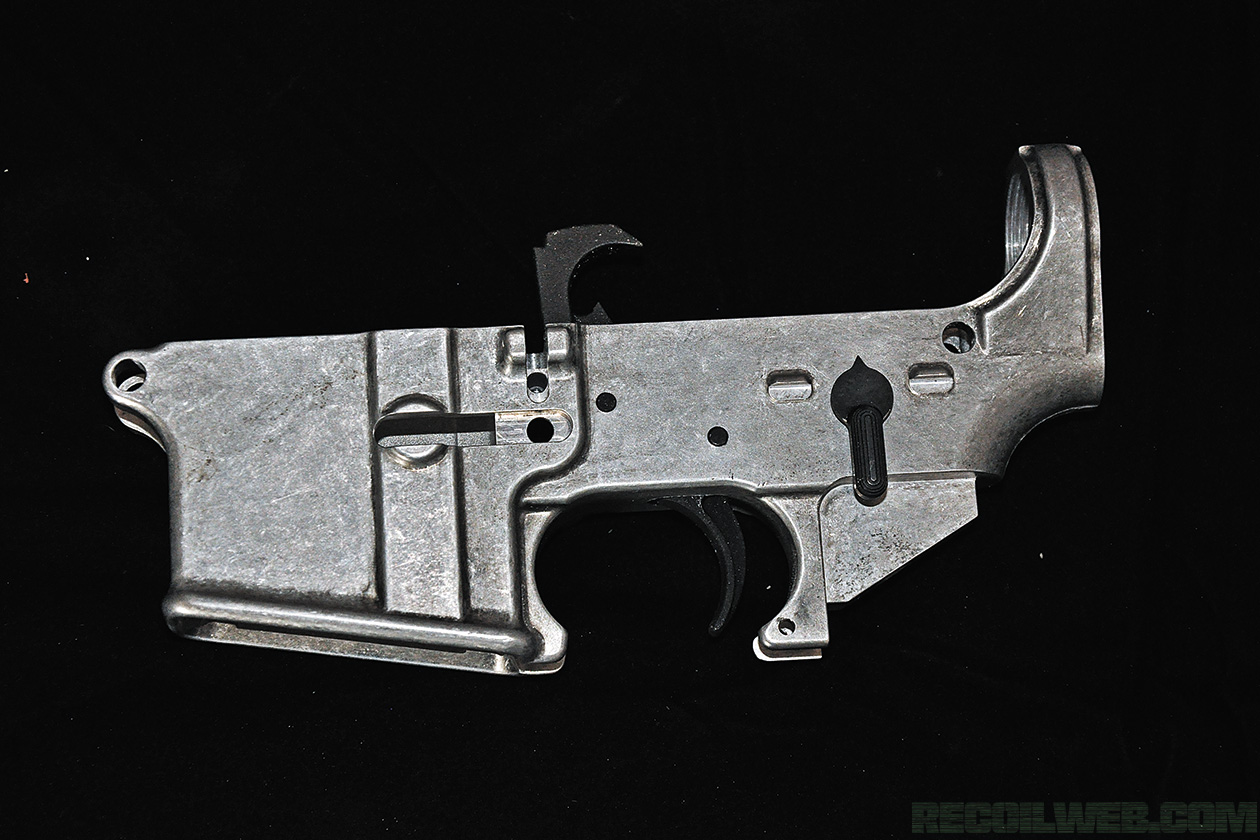
Use the hammer, trigger, and selector from your lower parts kit to test fit as you go, removing only as much material as necessary.
Step 9
Once the three components will drop in, insert the pins and check for function. With the selector on Safe, press on the back of the hammer and pull the trigger. The hammer shouldn’t drop — if it does, you have a problem caused by the relative placement of the fire control holes. If it passes muster, congratulations! You now have a choice to make as to what type of finish to apply to your fully functional Death Star AR-15 receiver.
Sources
Brownells | www.brownells.com
Grainger | www.grainger.com
McMaster-Carr | www.mcmaster.com
Billet Rifle Systems | www.billet80.com
American Spirit Arms | www.americanspiritarms.com
A great little rifle and a great new round. How does a Pure Precision rifle…
Steel case ammo is back! Or is it? Magtech Steel Case 9mm is one of…
Rugged SurgeX is built like a tank, but can it be as quiet as you…
The old things are new again! Springfield Armory is releasing their SA-16A2, an M16A2 clone…
A piece of history that has an earned reputation for being on the of the…
Do you own body armor? Should you? We take a closer look at the pros…